Greater Midwest Foodways Alliance
FAMILY HEIRLOOM RECIPES
Contestants entered their best scratch family heirloom recipe suitable for a family or community dinner. Recipe should originate before 1950.
Contestants brought a prepared dish along with a brief story of who passed the recipe down to them, ethnicity, if relevant, number of years the recipe has been in their family and any interesting information about their recipe.
JUDGING CRITERIA
Taste: 50%
History: 40%
Appearance: 10%
Competition was conducted on August 17th, these are the results:

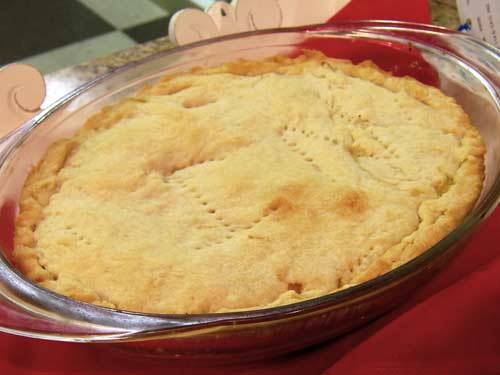
N&J’s Chicken Pot Pie (image by Peter Engler)
First Prize
N & J’s CHICKEN POT PIE
Mary Jane Wilkens, Indianapolis, Indiana
We lived with my Grandmother in West Virginia while my Dad was defending our country during World War II; I was just a few months old and was told that my Mom worked as a waitress on the base while he was gone. My Grandmother did the cooking and care of me. As the war drug on my Grandmother thought that since both of her sons had enlisted maybe she should do her part, so she enlisted in the WAC. She worked on the airplanes and flew some to test. My mother and I stayed at Nanny’s cousin’s Juanita while she was gone. After Nanny,as I later called her, came home she picked up where she left off on her cooking skills and was she a terrific cook.
As I grew and started school my family moved to Indiana but much to my delight I still spent the summers with Nanny. She had her own garden and much of what she cooked came from her garden or her cousins’ small chicken farm. One night a week we would have Chicken Pot Pie and of course the chicken came from her cousin Juanita. I would never go with her to Juanita’s when she would pick up the chicken because I couldn’t bear to watch Raymond, Juanita’s husband, wring the chickens neck and flop til they dropped.
Nanny and Juanita were not only close cousins they were fantastic cooks. When you put the two of them together in the kitchen heavenly aromas would fill the house. I feel that my love of cooking comes from Nanny. This is still a favorite of my family.
The recipe that I have submitted is one of their co-op dinner meals. I’m really not sure how old the recipe is but, my Mother thought it was some time around World War II.
N & J’s CHICKEN POT PIE
Mary Jane Wilkens, Indianapolis, Indiana
(as Nanny wrote the recipe)
3 cups cooked chicken
2 1/2 cups chicken broth
2 heaping hands full of carrots
2 level hands full of onions
a tad of butter
pinch of celery salt
pinch of pepper
bigger pinch of salt
2 heaping hands full. plus a little extra shelled peas
3 cups cooked chicken
2 1/2 cups chicken broth
3/4 cup chopped carrots
1/2 cup chopped onions
2 Tablespoons butter
1/4 teaspoon celery salt
1/4 teaspoon pepper
1/2 teaspoon salt
1 cup frozen peas
PASTRY:
Sift together:
2 cups all-purpose flour
2 teaspoons baking powder
1 teaspoon salt
Mix well and stir into flour mixture
2/3 cup shortening
1/2 cup hot water
1 tablespoon lemon juice
1 egg yolk, unbeaten
Chill, pat out 3/4 of pastry as lining in 2 quart casserole, fill with Chicken mixture cover with rest of pastry and Bake at 425 for 25 minutes.
In a large saucepan heat the chicken broth, butter, salt, celery salt, pepper while you cut the carrots and onions. Put carrots in broth and cook about 10 minutes before adding the onions, peas and cooked cut up chicken. Meanwhile mix in small bowl 3 Tablespoons of flour and 3 Tablespoons of milk, for thickening, and whisk together add hot broth a tablespoon at the time to the flour mixture til all the flour mixture is tempered and then add to the saucepan and cook til slightly thickened about 10 minutes, then pour into shell and bake according to pastry directions.

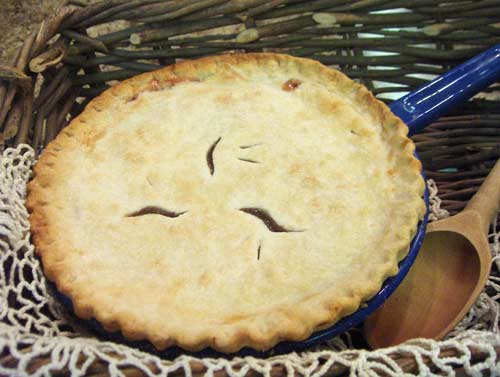
Gooseberry Raisin Pie (image by Catherine Lambrecht)
Second Prize
Grandma’s Gooseberry-Raisin Pie
Fanehoon Resler, Bluffton, Indiana
Our little fingers reached gingerly into the prickly bush to pluck the ripe berries from Grandma Fulford’s gooseberry plants. We liked to pop them into our mouths and taste their juicy tartness. But we weren’t too fond of Grandma’s gooseberry pie – until she sweetened it up with a handful of raisins. Thus this delicious recipe for “Gooseberry-Raisin Pie” was born back in the early 1940’s.
Grandma was widowed in 1917 and labored in creative ways to support her son and daughter in a time when women dido’t work outside tbe bome in ber community. One task sbe could be counted on to do for her neighbors was to go on butchering day and help render down the lard. Fresh sausage, cracklings, and lard would be her pay, so she always had a supply of lard with which she made her pie crust.
Although the recipe as given here is quite specific, it is doubtful that Grandma ever wrote it down just this way. I’m sure she had only the old tin measuring cups I still have, and it was indeed a “handful” of raisins she would have added. My sisters and I still have gooseberry bushes in our yards in memory of Grandma, and our 62-year-old brother, sticks his fingers into the bush to pluck the berries just as we did so long ago when we were children.
Grandma’s Gooseberry-Raisin Pie
Fanehoon Resler, Bluffton, Indiana
(This crust recipe actually makes a large two-crust pie and another one-crust pie. When Grandma fired up the wood range, she never made just one pie!)
Crust:
4 cups all-purpose flour
1 tablespoon granulated sugar
1 teaspoon salt
1 1/2 cups lard
1/2 cup cold water
1 large egg
Filling:
2 cups fresh or frozen gooseberries
1/2 cup granulated sugar
1/2 cup brown sugar
2 cups water, divided
3 tablespoons corn starch
2 cups raisins
1 tablespoon lemon juice
2 tablespoons water and 1 tablespoon sugar for glaze and sugar to sprinkle on top
For crust, combine .flour, sugar and salt. With two table knives, cut in lard to form coarse crumbs. Measure water into measuring cup; add egg and stir with a fork. Pour over flour mixture, mixing with fork just to combine welL Form into three balls.
For filling, in saucepan over medium heat, cook gooseberries with sugars and 1 1/2 cups water to boiling. Turn down heat and simmer for 5 minutes. Mix together remaining 1/2 cup water and corn starch. Stir into hot mixture, stirring until thickened. Add raisins and lemon juice.
Roll out one pie crust and line bottom of blue granite pie plate. Pour hot filling mixture into crust. Moisten rim of bottom crust. Roll out other crust, cut design in top for venting, and layover hot filling. Pinch crusts together, trim, and crimp edges. Brush top with glaze made of sugar dissolved in water and sprinkle with sugar.
Place near bottom of 400 degree oven and bake for 40-45 minutes until juice begins to bubble and crust is well browned. Cool on rack before cutting.

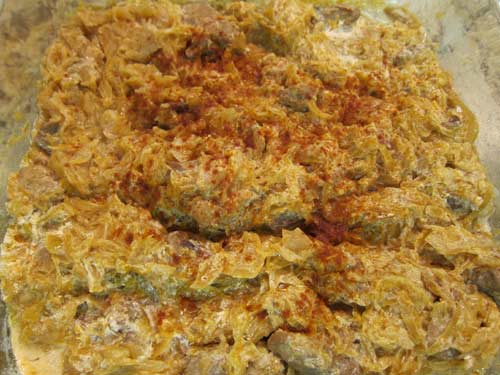
Szekely (image by Barbara Kuck)
Third Prize (tie)
Szekely
Jacqueline Luzar, Indianapolis, Indiana
In 1912, my great grandparents left Budapest, Hungary to begin a new life in Cleveland, Ohio. Food preparation was an important way of connecting to the home they left behind, as well as a way of bonding and finding common ground with others in the Hungarian Immigrant community.
Cherished recipes allowed my family to express their heritage and identity, while forging a new life in the United States. Great-grandmother was widowed when her daughter was only four years old and worked very hard to support the family. Although very busy, she felt the most important thing a mother could teach her daughter is to cook well, and so recipes such as Szekely, Hungarian stuffed cabbage, chicken paprikash and many desserts were passed on.
My generation may not know the voice or whims of great-grandmother, but her recipes allow us to know her through the foods she loved and for our senses to interact with the homeland she bravely left behind. Szekely has been prepared by all the women in my family and is the most popular request for dinner after someone has been away from home for some time. Several years ago, when I moved to Indiana, I began to meet people who did not know about Szekely or other Hungarian dishes. I wanted to share my family’s heritage with friends and they in turn shared foods passed down through their generations. Heirloom dishes are not only delicious, but educate us about who our families and neighbors were, teach us about ourselves, and are worth sustaining into the future.
Szekely
Jacqueline Luzar, Indianapolis, Indiana
6 cups of sauerkraut (rinsed if needed to reduce sourness)
1/4 teaspoon caraway seeds, lightly chopped
3 Tablespoons butter
3 Strips of smoked bacon cut into small pieces
3 Tablespoons paprika (or more to taste)
1 Tablespoon salt
1 pound pork cut into bite sized pieces
1 Large onion diced
1-2 cloves garlic, chopped
1/2 cup water or as needed
1 half pint of sour cream
In a large pot, simmer the sauerkraut and caraway seed together with enough water as needed for approximately half an hour. Melt the butter in a large sauce pan and cook the bacon until the fat has begun melting nicely. Next add the pork and cover with the paprika and salt and cook until the pork is lightly browned. Add the diced onion and cook together with the pork until the onion turns clear. Add the bacon, pork, and onion mixture, along with the garlic to the sauerkraut and simmer together for two hours or so. Thoroughly mix in the sour cream about 15 minutes before the dish will be served. Add additional paprika as desired. This dish is also good cold.

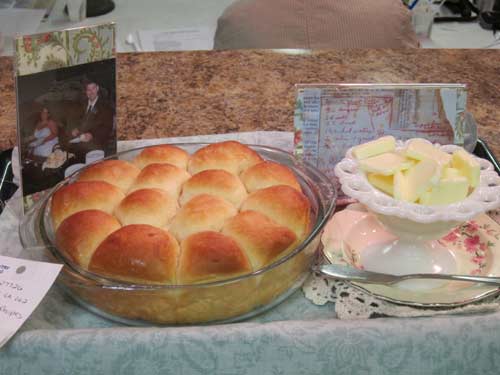
Favorite Yeast Rolls (image by Barbara Kuck)
Third Prize (Tie)
Favorite Yeast Rolls
Deborah Green, Fortville Indiana
Among my most prized possessions are two scrapbooks compiled by mother. They contain hundreds, if not thousands, of recipes that she gleaned from magazines and newspapers during her lifetime. I love to peruse these volumes hoping to find inspiration for a new recipe, but one recipe that I never need to look up is her Favorite Yeast Rolls because it’s permanently etched into my heart. This is the one that can best be characterized as our “family” recipe. She copied it from a Capper’s Farmers magazine in the 1940’s and is probably the only roll recipe I have ever known or even needed.
This recipe was considered a convenience food during my childhood, because its high sugar content would allow the yeast to grow even in the cold environs of the refrigerator. This made it possible to make the dough and for several days have it ready to make out rolls quickly in the late afternoon and have their yummy aroma filling the house each night as our crew of five hungry children awaited the evening meal. Hot rolls were a staple in our house.
At an early age, I stood in a chair at the kitchen table and helped mom fashion the plain pan rolls that were lined up in rows in a clear Pyrex dish. As I grew older I advanced to making a crescent-shape roll and even won a champion in 4-H. Not a lot has changed with this recipe through the years. I now use dry yeast rather than the compressed yeast cakes that were available back then. I sometimes exchange some of the flour for a whole wheat variety. When its banquet time at church, I pull up the shopping list for 25 dozen on my computer. For me bread-making is a passion and this recipe, with its variations, have netted me several blue ribbons at the Indiana State Fair. Bread-making is a craft I promote: Through Extension Homemakers and my Come and Dine and Kids in Kitchen ministries at church, I have given over 90 people hands-on lessons in preparing these refrigerator rolls.
My daughter and nieces are the third generation to use this recipe. It is on the menu at most of our family gatherings. (No store bought rolls for us!) A special moment for all of us was my daughter’s wedding in June. With the help of my family and friends, the first thing on the buffet table at the wedding was … of course … Favorite Yeast Rolls.
Favorite Yeast Rolls
Deborah Green, Fortville Indiana
Ingredients:
2 packages dried yeast
1/2 cup warm water
1/2 cup sugar
2 teaspoon salt
3 tablespoons butter
1 1/2 cup hot water
2 eggs
7 cups flour
In a small bowl, dissolve yeast and about 1 tsp. sugar in the warm water. Let it rest until it foams.
During this time combine remaining sugar, salt, butter and hot water in a large bowl. Let this mixture cool to luke warm. Add yeast mixture, eggs and 2 cups of flour to mixture in large bowl. Beat for two minutes with a mixer or 200 strokes by hand. Gradually add remaining flour, eventually turning the dough onto a floured surface and kneading it until it is spongy. Place dough in a greased container and let rise until double in bulk. (This dough can be put in the refrigerator if it is covered and greased well for a “slow” rise. It will keep several days)
Make rolls into desired shape: Pan, crescents, parker house, cloverleaf, pan, etc. Place rolls on a well greased baking sheet.
Let rise until double in size. Bake at 400 degrees for 5 minutes, then reduce temperature to 375 degrees for approximately 5 more minutes.
Makes approximately 30 rolls