Greater Midwest Foodways Alliance
FAMILY HEIRLOOM RECIPES
Contestants entered their best scratch family heirloom recipe suitable for a family or community dinner. Recipe should originate before 1950.
Contestants brought a prepared dish along with a brief story of who passed the recipe down to them, ethnicity, if relevant, number of years the recipe has been in their family and any interesting information about their recipe.
JUDGING CRITERIA
Taste: 50%
History: 40%
Appearance: 10%
Premiums sponsored in partnership with Feedstuffs FoodLink.com

1st place – $150., 2nd place – $100., 3rd place – $50

Pampered Chef is sponsoring additional prizes for our winners:
First place: Reversible Bamboo Carving Board (Value = $72)
Second place: Cool & Serve Square Tray, Outdoor Mini Spoons & Tongs Set (Value = $49)
Third place: Food Chopper (Value = $31)
Competition was conducted on August 10th, these are the results:
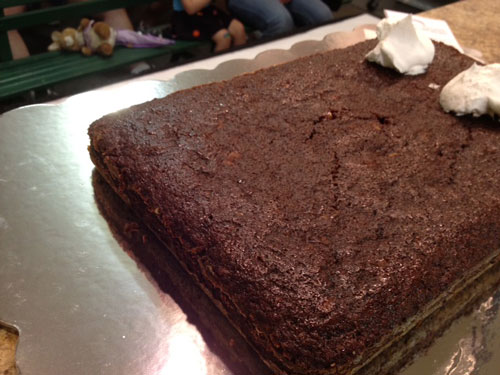
Grandma Jeffs “Black Cake” (image by Jolene Ketzenberger)
Grandma Jeffs “Black Cake”
Pat Schafer, Brownsburg, Indiana
As a kid I never thought much about this dessert because it was always there when all my family along with all my mom’s brothers, sisters and their kids gathered for Thanksgiving and or Christmas at my grandparent’s house in Spiceland, In.
You have to understand my grandfather farmed for another man and lived on his property in a little 3 bedroom house with a very, very small kitchen that managed to produce a lot of food over the years for 9 children plus parents.
With my dads family scattered and his own parents and only sister across the country it because the ritual to spend all holidays at my mom’s parents, (my grandma and grandpas), until they became older and mom’s siblings began to share the responsibility each holiday.
You ask what’s all that got to do with Grandma Jeffs black cake? Well I’ll tell you. This cake became a symbol of my childhood and family and all that was good in the 50’s and 60’s as I grew up. It’s only now when my own parents are gone and almost all of my mom’s siblings as well that I began to ask the origin of the “black cake”. My mom was the oldest of 9 and she passed away at 84. Her youngest sister my Aunt Mary approx. 70 remembers as a kid herself being the designated person by grandma to chop the nuts for the cake.
When I decided to enter this cake in the contest I started to ask why did we only see this cake at Thanksgiving and Christmas? My sister and I have concluded that since my mom was born just prior to the depression and subsequent WWII(as were most of her siblings) we figure that the holiday was the only time that grandma allowed herself the luxury of using sugar, spices and raisins to make a sweet treat. We know the recipe is over 50 years because my Aunt Mary (who is 70 used to chop the nuts for it as a kid.
The last part is why is it black? As a kid I always thought it was black because it was burnt but obviously that isn’t true so the only thing you can surmise is its due to the cocoa. AND last but not least it was never iced. Grandma used to allow us a “dollop” of whipped cream to put on top which was probably again more readily available than sugar during that period in history to make than a real icing.
So there you have it —-a recipe dictated by the depression and subsequent WWII but the face of a family getting together over holidays and breaking bread together.
Grandma Jeffs “Black Cake”
Pat Schafer, Brownsburg, Indiana
2 C. granulated sugar
1/2 C. shortening
1 egg
2 C. Applesauce
1 C. chopped Walnuts
1 C. raisins
2 C. All purpose Flour
2 T. baking cocoa
2 Tsp. Baking Soda
1 Tsp. Cinnamon
1/2 Tsp. Cloves
1/2 Tsp. Allspice
1/8 Tsp. Salt
Cream sugar, shortening & egg. Assemble All dry ingredients, sift and set aside.
Alternate blending in applesauce and dry ingredients, only mix till blended in.
F old in nuts and raisins by hand so as not to over beat ingredients.
Preheat oven to 350 degrees. Pour cake mix into 1- 9″ x 13″ glass pan, greased and floured. OR could use 2 smaller pans approx. 6″ or 8″ square or round.
Bake 60 min. test to make sure toothpick comes out clean. Cool and serve with dollop of Whip cream.
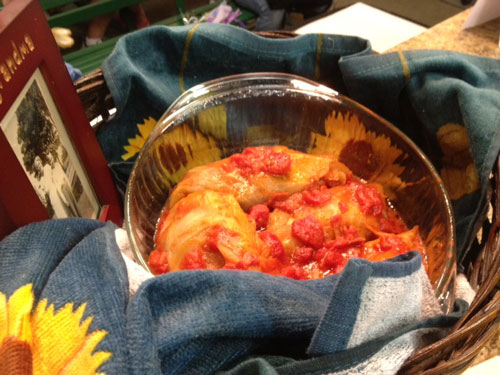
Golabki (Image by Jolene Ketzenberger)
Golabki (pronounced goo—ump–kee) Polish Cabbage Rolls
Christine Rienecker, Indianapolis, Indiana University
Golabki (pronounced goo-ump-kee), or Babu’s (pronounced bah-boo) Cabbage Rolls
(Babu means grandmother in Polish)
My grandparents lived in a 3-story house in the village of New York Mills, New York. Theresa and Stanley Labuz had ten children, chickens and a big garden. As teenagers, they had immigrated to the United States from Poland, married in New York and worked very hard to care for the children with which they were blessed. Depending on his or her age, each child helped with cooking, the care of the house, the garden or taking care of siblings.
My grandparents welcomed everyone and share whatever food they had, even with such a large family. Although they had many struggles, and lived a very humble life, there was joy and laughter, and delicious aromas emanating from 270 Main Street. My grandmother started a tradition of feeding guests, no matter what time of day or night they arrived. “Sit! Eat!” It was almost mandatory to pull a chair up to the massive dining room table and dig in to a hearty meal, even late at night.
My grandmother’s garden provided the cabbage and onions for the Golabki, which became a mainstay of the family meals long before World War II. The chickens provided the eggs, and the local butcher, Mr. Hipanowicz (pronounced Hoppa-Novich), provided the salt pork and beef used to make these delectable cabbage rolls.
I have the most wonderful memories of Babu’s kitchen and garden. The only thing missing when I sit down to enjoy the Golabkis is a small glass of my grandmother’s homemade brandy.
Golabki (pronounced goo—ump–kee) Polish Cabbage Rolls
Christine Rienecker, Indianapolis, Indiana University
1 (3 1/2 lb.) head of green cabbage
1/4 pound salt pork – sliced
1 cup chopped onion
2 Ibs. ground beef
1 1/2 cups cooked rice
1 large egg
1/2 teaspoon pepper
1 teaspoon salt
2 cans (10 3/4 oz.) tomato soup
1/2 cup water
2 1/2 cups whole tomatoes in puree (No.2 can); cut tomatoes in small pieces
Core cabbage; remove wilted outer leaves and discard. In a Dutch oven boil enough water to cover cabbage. Place cabbage in boiling water. Cook over medium-high heat. With a fork remove leaves as they separate from the head. Drain leaves; cool. Trim main leaf stems; set aside.
Preheat oven to 350°. In a frying pan place 3 slices of salt pork and onion. Cook over medium heat until onions are golden brown, stirring frequently. Discard salt pork.
In a large mixing bowl, combine onion, ground beef and rice, and mix well. Add egg, pepper and salt. Mix well. In a medium bowl, combine tomato soup, water and tomatoes in puree; mix well and set aside. In a large roasting pan, place remaining salt pork in bottom of pan. Cover with tiny inner cabbage leaves. Using 2 to 3 tablespoons of filling–depending on leaf size-place filling on cabbage leaf near the base. Fold bottom of leaf over filling, then fold sides toward center. Roll tightly. Repeat with remaining cabbage leaves and filling. Place seam-side down in roasting pan. Pour remaining tomato mixture evenly over cabbage rolls. Cover pan with foil. Bake for 1 hour or until fork-tender. When rolls are done, remove pan from oven and discard the salt pork and cabbage leaves that were placed in the bottom of the pan.
Yield: 20 to 22 cabbage rolls
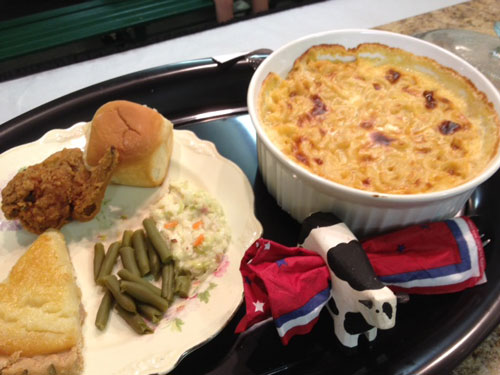
Mom’s Macaroni and Cheese (Image by Jolene Ketzenberger)
Mom’s Macaroni and Cheese
Phyllis Hine, Waveland, Indiana
Born in 1937 – Grew up on a 200 acre farm in beautiful Parke County – Covered Bridge Country. Was a 10 year 4-Her and won several honors. On the farm we had dairy cows, beef cattle, chickens and lots of fruit trees – cherry, peach and pear. We always had a big garden and canned and froze all our foods from the garden. Helped my father milk the 5 dairy cows every evening after school. We sold our milk to Kraft Foods at Marshall, Indiana. I showed our shorthorn beef cattle in 4-H and had many champions. Growing up mom’s macaroni and cheese was always made on Sunday for dinner along with fried chicken, green beans, slaw, homemade rolls and sugar cream pie. Every spring we would get 75 baby chickens to raise for our food in the summer and winter. Green Beans came from the garden we canned and froze. We had cabbage from the garden and made freezer slaw for the winter. Mom always made homemade rolls and sugar cream pie. It was always fun to go to the milk house and skim the cream off the top for our sugar cream pie. My mother passed her home made macaroni and cheese recipe on to me and I passed it on to my daughter. The recipe has been in the family for 75 years. Here is a picture of my mother who passed away in 1988. The other picture is at a family gathering at my daughter’s. We always have mom’s macaroni and cheese and we always double the recipe when take it to our Portland Mills Homecoming where I grew up.
Mom’s Macaroni and Cheese
Phyllis Hine, Waveland, Indiana
1 1/2 cups uncooked elbow macaroni
2 tablespoons butter
1 onion, chopped (1/4 cup)
1/4 cup all-purpose flour
1/2 teaspoon salt
1/4 teaspoon pepper
1 3/4 cups milk
8 oz Velveeta cheese loaf, cut into 1/2 inch cubes
1. Heat oven to 350 degrees. Cook and drain pasta as directed on package.
2. Meanwhile, in 3-quart saucepan, melt butter over medium heat. Add onion. Cook 2 minutes, stirring until onion is softened. Stir in flour, salt and pepper. Cook 2 minutes, stirring constantly, until smooth and bubbly. Remove from heat. Stir in milk with wire whisk. Return saucepan to medium heat and heat to boiling, stirring constantly. Continue boiling and stirring 1 minute.
3. Remove saucepan from heat again. Stir in cheese until melted and smooth. Stir macaroni into cheese sauce.
4. Pour macaroni mixture into ungreased 1 1/2-quart casserole. Bake uncovered 30 minutes or until bubbly and light brown.
Makes 5 servings
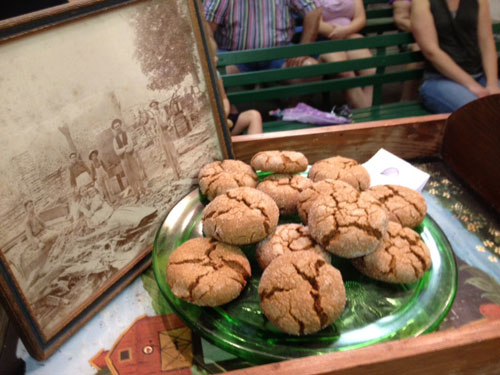
Molasses Cookies (Image by Jolene Ketzenberger)
Molasses Cookies
Rachael Tryon, Indianapolis, Indiana
Always a Full Cookie Jar
I remember growing up in a small rural town in Indiana that we didn’t always have a lot of luxuries such as television or washers and dryers, but one thing we did have was always a full cookie jar. We thought our mother made the best cookies and one of our favorites was molasses. These cookies seem to empty the cookie jar the fastest. One of the stories I remember being told in relation to these cookies was about my great grandfathers’ sorghum mill. We would be told by my grandfather and my mother about the steam and heat that would come from the mill. My grandfather would tell how it took a long time to get cleaned up after working the mill. While I would listen, fascinated with the stories, I never fully realized the work that was involved with making molasses until I visited an active old-fashioned sorghum mill and saw the process. I can only imagine how hot, sweaty, and sometimes sticky my grandfather must have gotten. When I look at the picture of my great-grandparents and their children at the mill, I think about how much time and effort it took to make just a few quart jars of sorghum molasses that later would become a wonderful cookie.
These cookies are still a favorite of mine and now have become a favorite of my children. Every time my mother asks her grandchildren what kind of cookies they would like they always answer “Molasses!” As they eat the cookie, they too are told the story of the sorghum mill.
Molasses Cookies
Rachael Tryon, Indianapolis, Indiana
Mix thoroughly:
3/4 cup soft shortening
1 cup brown sugar
1 egg
1/4 cup molasses
Sift together and stir in:
2 1/4 cup flour
2 tsp soda
1/4 tsp salt
2 tsp cloves
1 tsp cinnamon
1 tsp ginger
Chill dough. Roll into balls. Dip tops in sugar. Place sugared side up on cookie sheet. Sprinkle each cookie with 2 or 3 drops of water. Bake just until set at 375 degrees for 10-12 minutes
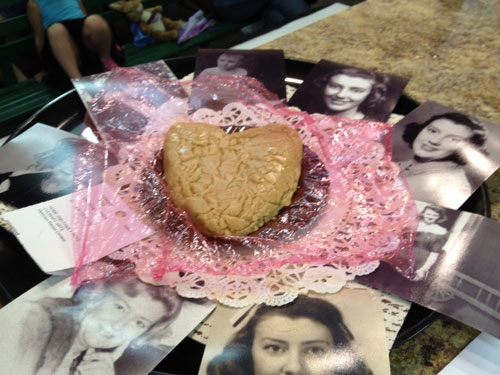
Mom’s Peanut Butter Fudge (Image by Jolene Ketzenberger)
MOM’S PEANUT BUTTER FUDGE
Deborah Bronnenberg, Noblesville, Indiana
Mother, born in 1921, always had a sweet tooth. As a youngster during the depression she developed this recipe using limited funds and ingredients. Mom became “famous” for her peanut butter fudge taking it to family and holiday gatherings and sharing with friends.
An R.N. during World War II, mom worked in the hospital nursery caring for newborns and premies. Nursing mothers would donate milk to the hospital milk bank. Any leftover milk was discarded after 24 hours. Rather than toss this nutrient rich mother’s milk, mom would make her peanut butter fudge and serve to the doctors, nurses and patients, unbeknown to them the milk source. Had they known, mom said, they wouldn’t have eaten it.
In 2010 mom passed away. At a family gathering sometime later, a nephew asked if anyone had gotten “the fudge recipe.” All the family was surprised with the recipe’s simplicity. I then realized I was the only one who knew it because it wasn’t written anywhere.
This is the actual recipe! The changes I made were to actually measure ingredients instead of mom’s quote, “BY GUESS AND BY GOLLY”. She used vanilla in everything!
In this recipe, I have used whole milk and Jif peanut butter but I’ve had equal success using skim milk and low fat peanut butter. I would butter the pan if using low fat ingredients. Any size pan may be used depending upon the desired thickness of the fudge. Store covered.
With loving memories, I present
Mom’s Peanut Butter Fudge.
MOM’S PEANUT BUTTER FUDGE
Deborah Bronnenberg, Noblesville, Indiana
2 CUPS GRANULATED SUGAR
1 CUP MILK
3/4 CUP PEANUT BUTTER, ANY VARIETY
1 TEASPOON VANILLA
8″X 8″ UNGREASED PAN
..
Boil sugar and milk until a drop of mixture becomes a soft ball when dropped in 1/2 cup cool water or just until begins to caramelize. Stir very occasionally after it begins to boll. Remove from beat and immediately place the peanut butter and vanilla into mixture and stir until it loses gloss and begins to set up. Place into pan. As it cools, score into squares. Cover to keep from drying when stored.
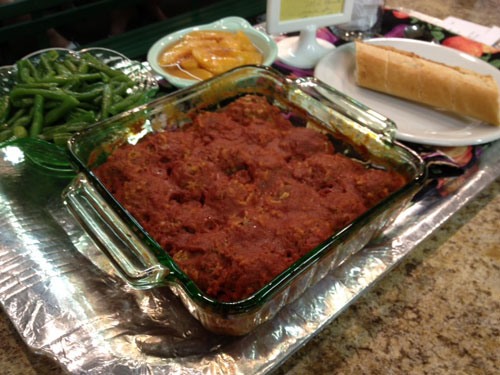
Porcupines (Image by Jolene Ketzenberger)
MARY ANN’S PORCUPINE MEATBALL DINNER
Eileen Beyer, Shelbyville, Indiana
This recipe for Porcupine Meatballs is from my mother’s kitchen, as are so many of my recipes. My mother, Mary Ann, received this recipe from the mother of my sister’s schoolmate. I am 57 years old and my sister whom I am referring to is older than I am; this recipe was certainly created prior to the 1950’s and has been in my family alone for over 50 years now. As an adult, I first made this recipe for my 25 year old daughter’s first birthday in 1988 and still have the paper that I jotted it down on as I spoke with my mother over the phone.
Food was an important part of my mother’s life and was clearly an avenue for her creativity. As the mother of 13 children, everything she made was with all of our particular tastes in mind. I was a rather finicky eater and preferred the more crispy Porcupine Meatballs that were in each corner and along the edges of the roasting pan. My preferences were accommodated most of the time. With such a large family, you might think our meals were somewhat assembly line in fashion; however, we always sat together at a very large table in our dining room. The table was set with real dishes and silverware; nothing was disposable except perhaps for the napkins. All of my brothers and sisters were well-versed in the art of table setting and possessed a very acute sense of table manners, both of which were taught to us by our parents. We used the time together at meals to discuss events in our daily lives, each taking their turn to speak and comment as we went around the table.
My mother’s Porcupine Meatball Dinner was served most often in the cooler weather and will serve a very large family with no leftovers or a smaller family with a few leftovers. As this dish took some time to bake in the oven, it provided a wonderful aroma throughout our house on a cool fall or cold winter day. It is economical to prepare and is a hearty meal in itself as it contains protein (ground beef eggs), grain (rice) and vegetables (tomato juice and sauce). My mother did not serve it alone though, always including a vegetable, such as green beans, and as my mother used to say, “a nice crusty bread.” I hardly remember a supper in our home that did not include a homemade dessert, even if it was only peaches that my grandmother had canned and given to us. Very often, that was the finale to this wonderful meal.
Porcupine Meatballs are what I would consider a comfort food, closely resembling a meat loaf or cabbage roll recipe; however, I don’t recall anything my mother ever made that was not comforting. Don’t let the name Porcupine scare you though, these meatballs are made with lean ground beef and are only named as such due to the rice that is in the recipe which cooks and gives the meatball a porcupine-like appearance.
Last year, during the fair, I entered a contest and used another recipe of my mother’s that was originally my grandmother’s. I called my mother before the contest to make certain I had the story of the recipe and the ingredients written correctly and we talked for half an hour. This year is different for me, as my mother passed away in January after a very courageous 15 year battle with breast cancer. I miss not being able to call her and discuss recipes or the events of the day. I can still hear her voice from 24 years ago when I originally called to get her Porcupine Meatball recipe for Bridget’s 1st birthday as she said, “and don’t forget some nice crusty bread to go along with it.”
Cherish all of your memories, as well as old family recipes.
They both are quite priceless!
MARY ANN’S PORCUPINE MEATBALL DINNER
Eileen Beyer, Shelbyville, Indiana
Ingredients
3 lbs lean ground beef
1 1/2 cups rice (uncooked)
2 eggs
3/4 cup water
1 medium onion, diced
1 1/2 tsp salt
1/2 tsp ground black pepper
46 oz can tomato juice (my mother would call this a “tall” can)
29 oz can tomato sauce (my mother would call this a “fat” can)
Directions
Preheat oven to 350 degrees. Dice onion. In large mixing bowl, combine ground beef, rice, eggs, water, diced onion, salt and pepper. Mix well and shape into 2 inch balls. Place meatballs in 9×13 roasting pan. Pour juice and sauce over raw meatballs.
Cover pan with foil. Place in 350 degree oven and bake covered for 1 hour. Uncover and turn meatballs over if desired and bake uncovered for another hour. When rice is tender, the meatballs are done.
For a complete dinner, serve with steamed and buttered green beans and “nice crusty bread” (homemade or store.bought) and home canned fruit for dessert.
Easily serves a family of 8.
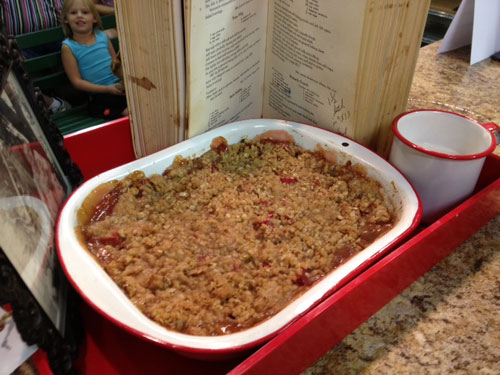
Rhubarb Crunch (Image by Jolene Ketzenberger)

Rhubarb Crunch
Kenda Friend, Indianapolis, Indiana
Service and simplicity are integral parts of the Mennonite tradition. Faith and food are closely linked, and this straightforward recipe reflects these ideas while reminding me of the strong faith of my grandmother.
With Grandma Emmert, nothing ever went to waste – based on principle and necessity. Raising five children on a small farm meant making the most of every resource, both for nourishment as well as faith witness. For example, as my mother tells me, in the summer if a can of milk went sour before the milk man came, Grandma would make homemade cottage cheese from it – enough to share with the neighbors.
The food on the table was simple and used what was at hand. One of the kids would go out to the rhubarb patch and cut off enough for this tasty dessert – a simple way to make dinner special. In fact, in looking at the family’s Mennonite Community Cookbook which I’ve included as part of my display, this was the only recipe marked with a rusted paper clip, indicating to me it was a “go to” recipe. On this precious page you can see her handwritten notations for making a batch and a half in a larger pan, which bowl to use for the crumbs, and even decades-old splotches showing its use! I’m sure neighbors, families with new babies and those going through hard times had a pan of this delivered to their door. Of course, church carry in meals would also be where this delicious rhubarb crunch would appear.
While I was only five when Grandma died, I know that this conscious effort to preserve, use and share the fruits of the family’s labor was important to her. I love hearing my aunts tell stories of food preservation – canning fruits, vegetables, meat, and pickles. It almost seemed like magic to Grandma when it became possible to freeze produce. How interesting that Grandma had a freezer but never in her life lived in a home with indoor plumbing!
Those days also produced family legends, like Grandma specializing in cherries since those were my Grandpa’s favorite. Grandma turned those tart cherries into everything from pies and cobblers to amazing preserves – so good that no one in the family can even come close to duplicating them. The picture on my display shows Grandma in her element – surrounded by grandchildren with the cherry-picking ladders at the ready.
It is appropriate to serve this recipe in the “Year of the Dairy Cow” as I am sure Grandma would have served this dish with a pitcher of cream, and a large dose of love.
Rhubarb Crunch
Kenda Friend, Indianapolis, Indiana
(Written as it appears in the 1950 Mennonite Community Cookbook)
Mix until crumbly:
1 cup flour, sifted
3/4 cup uncooked oatmeal
1 cup brown sugar, packed
1/2 cup melted butter
1 teaspoon cinnamon
Cover with 4 cups diced rhubarb
Combine the following:
1 cup sugar
2 tablespoons cornstarch
1 cup water
1 teaspoon vanilla
Place half of crumbs in a greased 9 inch baking pan.
Add diced rhubarb.
Combine second mixture and cook until thick and clear.
Pour over rhubarb.
Top with remaining crumbs.
Bake at 350 degrees for 1 hour.